Integration Astra with Zabbix
- Zabbix Server installation
- Zabbix Agent installation
- Zabbix Agent configuration
- Zabbix configuration
- Chart examples
Zabbix is an open-source platform for monitoring network services, servers, and applications. It can be integrated with Astra to monitor Streams and DVB Adapters.
Zabbix Server installation
Zabbix can be installed both on a dedicated server and on an Astra server
- Go to https://zabbix.com
- Select Zabbix version
- Select your OS
- Follow the installation instructions
You can find detailed information on Zabbix Manuals
Zabbix Agent installation
Install Zabbix Agent on the server with Astra.
- Go to https://www.zabbix.com/download_agents
- Select your OS
- Follow the installation instructions
You can find detailed information on Zabbix Agent Manuals
Zabbix Agent configuration
First of all Zabbix Agent should be configured to allow incoming connections from the Zabbix Server. Open the Agent configuration file located in /etc/zabbix/zabbix_agentd.conf with your favorite editor.
- Find the
Server=option and set the IP address or hostname of the server with Zabbix Server; - Find the
UnsafeUserParameters=option or append new and set value to1.
Save file.
Zabbix Agent receives all information from Astra with scripts writed on Python. Make sure that on your server installed Python3:
sudo apt install python3 python3-pip
for RPM-based system use yum instead of apt. Next install necessary library for Python:
pip3 install requests
Download scripts for Zabbix Agent:
curl https://cdn.cesbo.com/astra/zabbix/agent.tar.gz | tar -zxC /opt
Scripts will be saved to the /opt/zabbix_agent directory. Download service configuration file for Zabbix Agent:
curl -o /etc/zabbix/zabbix_agentd.d/astra.conf https://cdn.cesbo.com/astra/zabbix/astra.conf
And finally restart Zabbix Agent:
systemctl restart zabbix-agent
Zabbix configuration
Install Zabbix Template for Astra
Download the Template to your computer and import this file to Zabbix:
In Zabbix Web Interface open Configuration -> Templates, then click the Import button in the upper right corner. Click Browse and select the downloaded template file, then click Import button. After successful import, you will see a green message Imported successfully
Configure Template
In Zabbix Web Interface open Configuration -> Templates, then select Astra API monitoring and open the Macros tab. Fill next values:
- First line, set administrator password to Astra Web Interface
- Second line, set administrator username to Astra Web Interface
- The last line, the port of the Astra web interface. If you have multiple processes, specify all ports separated by commas. For example:
8000,8001,8002
Click Update button to apply changes
Connect Zabbix to Astra
In Zabbix Web Interface open Configuration -> Hosts, then click Create host in the top right corner. Fill following fields:
Hostname- any name of the server where Astra is installed, for example: AstraGroups- selectCesbo_templatesor create a new groupInterfaces- click add, selectAgentand specify the IP address or hostname of the server with Zabbix Agent
Open the Templates tab and in the field Link new templates append Astra API monitoring. Also if you want to control the general state of the system, append also Linux by Zabbix agent.
Save changes. After about 10 minutes, you will see graphs and triggers about the status of channels and adapters
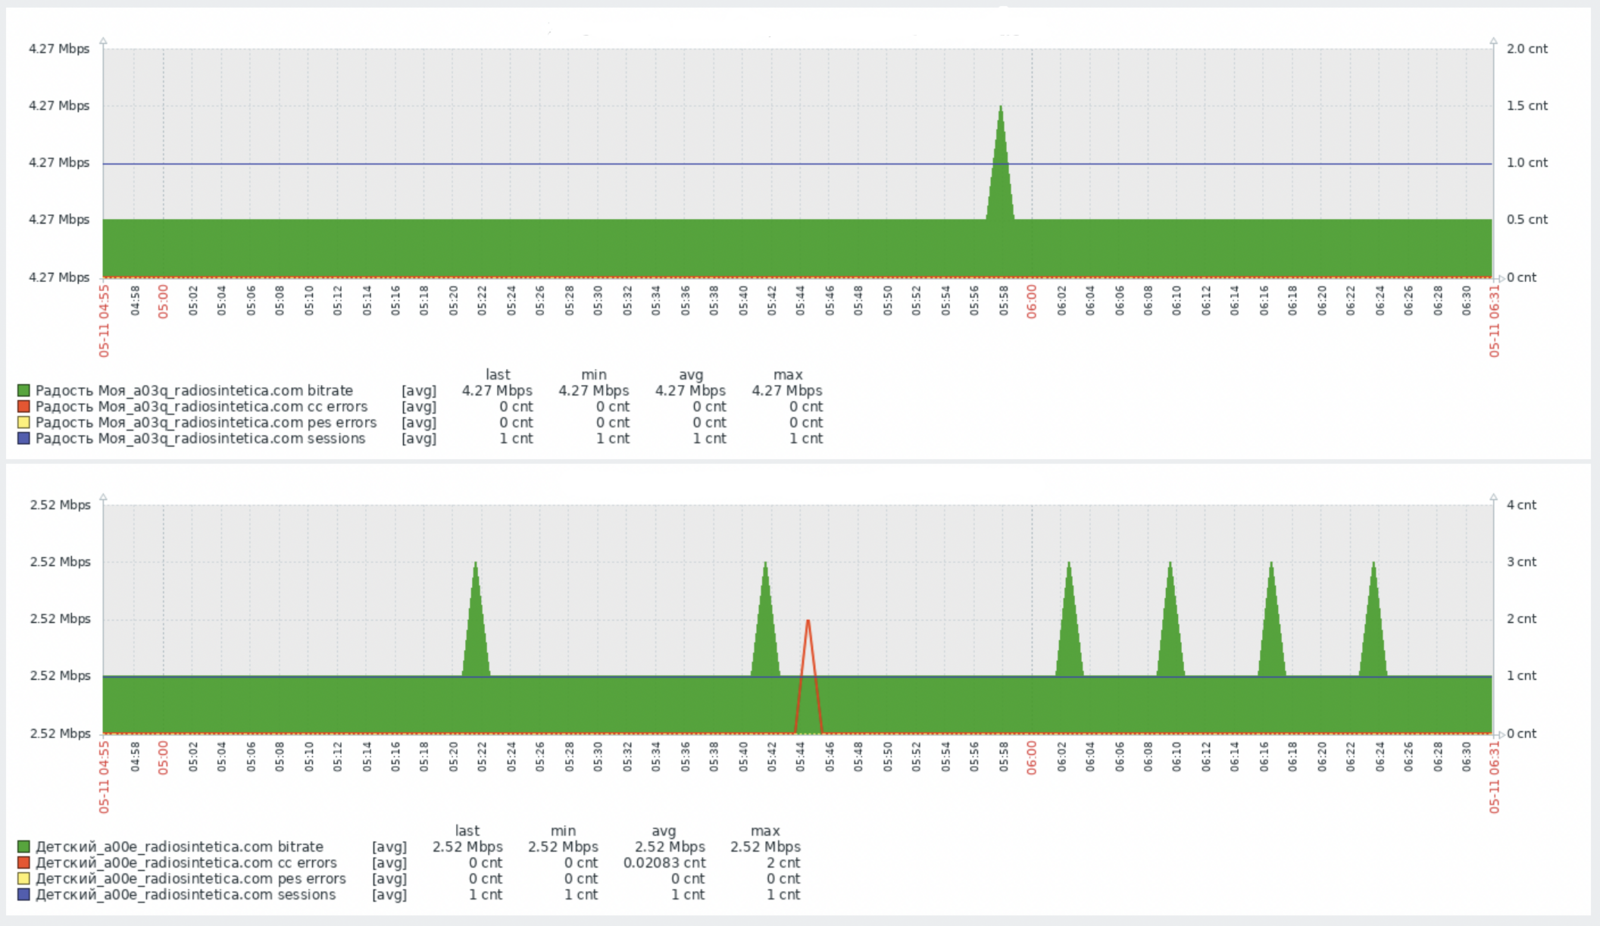
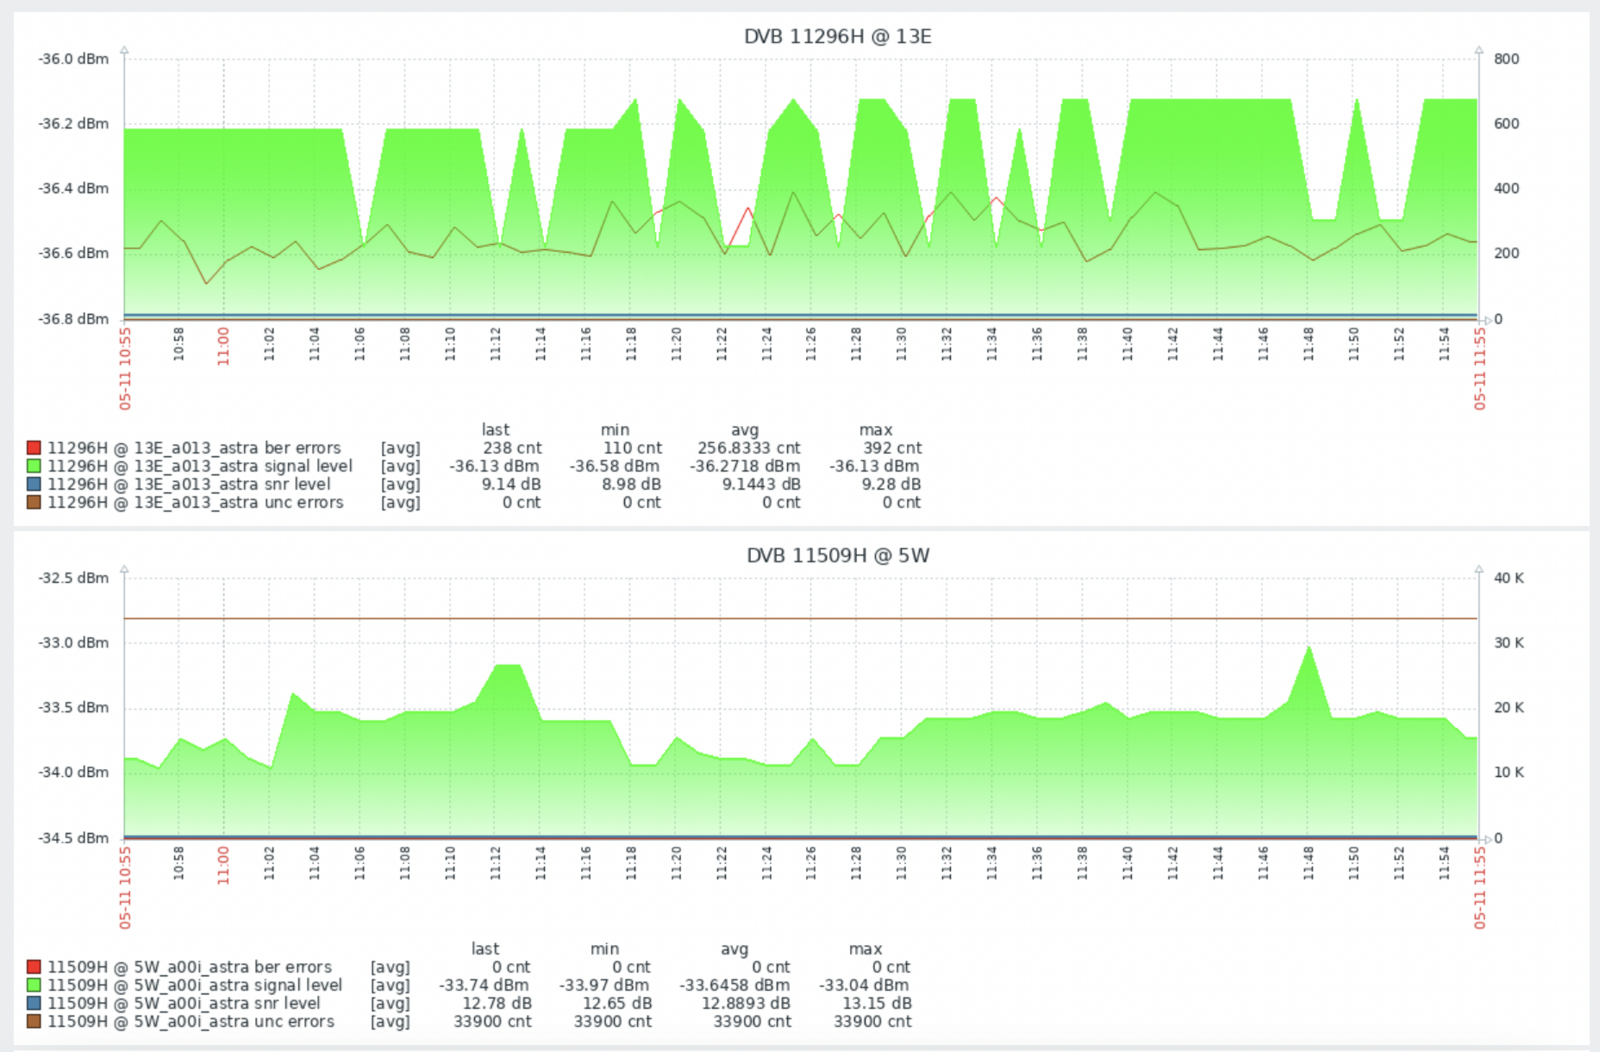
Chart examples